Fill Out The Form And Our Experts Will Contact You Within 3 Hrs.
EPIC EMR Integration
❝ Working with DreamSoft4u was a great experience. The team was highly responsive and professional. They not only understood our needs but also suggested the best possible options to enhance our project’s reach. Extremely satisfied with their work and looking forward to more collaborations! ❠
– Rick Tran
Healthcare IT Solutions (MRCS)
❝I am completely satisfied with the work delivered by DreamSoft4u. They provided exactly what I expected – a high-quality, custom solution at budget-friendly pricing. The team is skilled, experienced, and highly recommended.❠
– Kem Tolliver
Custom Healthcare Software (Cyomed)
❝Choosing DreamSoft4u for my custom healthcare software solution was the right decision. They have deep expertise and a team of experienced developers who delivered exactly what we needed. I highly recommend DreamSoft4u for any healthcare software or mobile app development project.❠
– Michel J. Kaldesh
Telemedicine App Development (Sniffle)
❝The DreamSoft4u team is extremely knowledgeable in telemedicine app development. They delivered the project exactly as expected, ensuring smooth functionality and compliance. I highly appreciate their work and recommend them as the best telemedicine app development company.❠
– Rich Blanton
EMR-EHR-PHR Solution (SmartDocs)
❝DreamSoft4u delivered exceptional quality at a cost-effective price. They efficiently managed frequent change requests and bug reports during development while maintaining a professional and polite approach. Their dedication and commitment are highly commendable.❠
– Nino Gorgia
mHealth App Development (Intouch EMR)
❝With DreamSoft4u’s 20+ years of healthcare software expertise, I entrusted them with my mHealth app project. They exceeded expectations by delivering a best-in-class solution ready to compete in the market—all within budget and with a faster time to market.❠
– Nitin Chooda
Generative AI
❝DreamSoft4u’s expertise in Generative AI transformed our product vision into reality. Their advanced AI solutions delivered highly accurate, scalable, and lightning-fast performance. We’ve seen remarkable growth in user engagement and operational efficiency. A truly innovative and forward-thinking team!❠
– Kenji Yamamoto USA
Digital Transformation Solutions
❝We partnered with DreamSoft4u for our digital transformation needs, and it was the best decision we could have made. Their team streamlined our processes, modernized our legacy systems, and delivered innovative solutions that exceeded our expectations. Truly a reliable technology partner!❠
DialogFlow (Formally called API.AI) is a conversational agent building platform from Google. You can call it Google Dialogflow. It’s a web-based platform that can be accessed from any web browser. The tool has evolved over time from what was built as an answer to Apple Siri for the Android platform. It was called SpeakToIt, an Android app that created Siri-like conversational experiences on any Android smartphone. The AI and natural language technology that powered the SpeakToIt app was opened up to developers as API.AI in 2015.
DialogFlow (API.AI) enables developers to create conversational experiences by providing them with tools to undertake two kinds of tasks: understand and generate natural language utterances and manage the conversation. While there are many competing tools available in the market, we chose API.AI because it was one of the first, is mature, and constantly evolving; additionally, it’s easy to use and can integrate within other services.
Why build a Chatbot?
A chatbot is, in essence, a piece of robotic software used to imitate human conversation through text chats and voice commands (a good example being Siri or Amazon Alexa).
Two Types of Chatbots:
Rule based chatbots (if you ask for phones the relevant phone pages open up in an e-commerce site that’s an example of a rule based chatbot)
AI. based chatbots (learn over a period of time using Machine Learning techniques) — dialog flow is an example of that
CREATE YOUR FIRST DIALOGFLOW AGENT
Step 1: Log in to Dialogflow
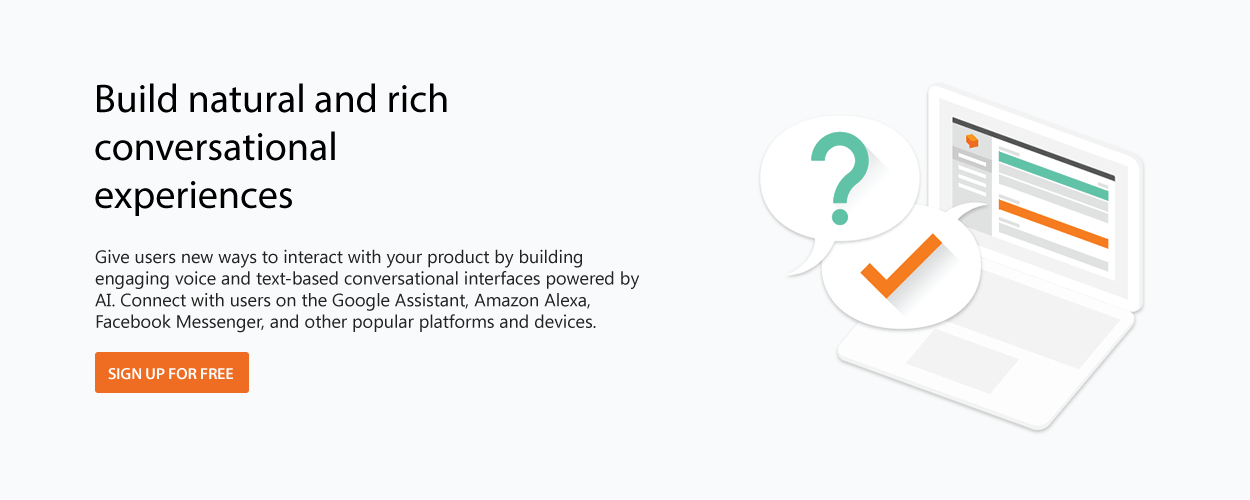
Go to https://dialogflow.com/.
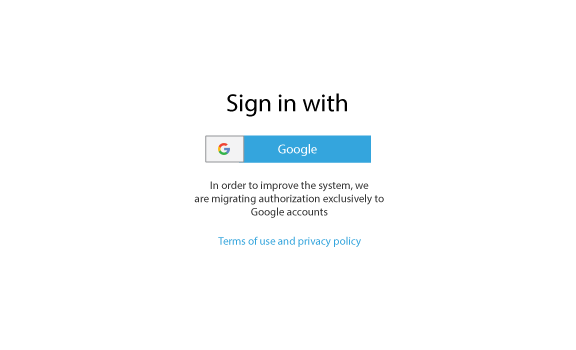
Now press SIGN UP FOR FREE.
And connect with your Google account. If you don’t have a Google account, you will have to create one in order to use Dialogflow.
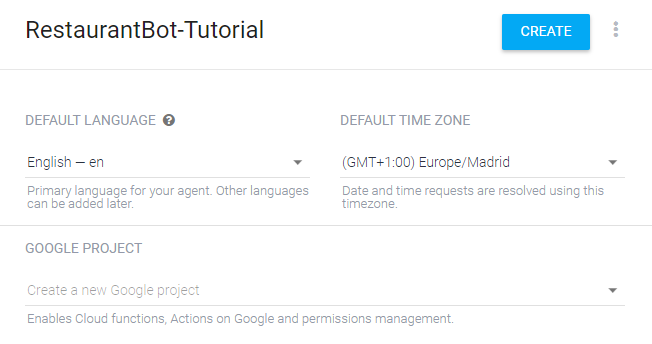
Read More: How To Build Facebook Messenger Chatbot Using ManyChatStep 2: Create a new Agent
Choose a name for your new bot and the default time zone. To properly follow the tutorial, you should keep the language in english.
Step 3: Make the bot say hello
Right now, the bot doesn’t know how to answer to any user input. The journey of teaching it how to behave is just starting. Firstly, let’s model a bit of the bot’s personality and make him/her respond to ‘hello’ and present itself.
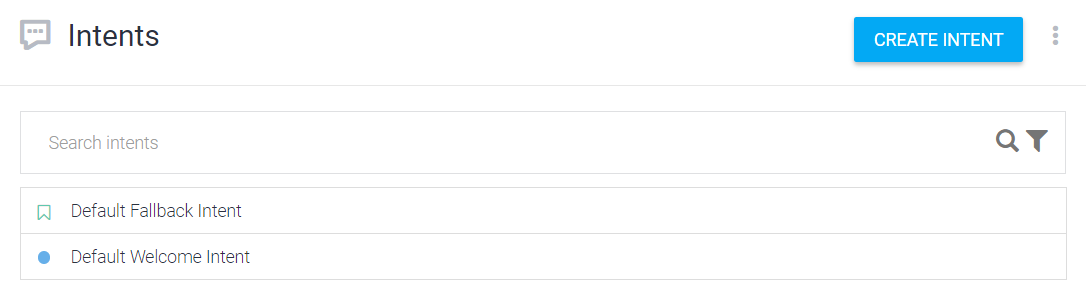
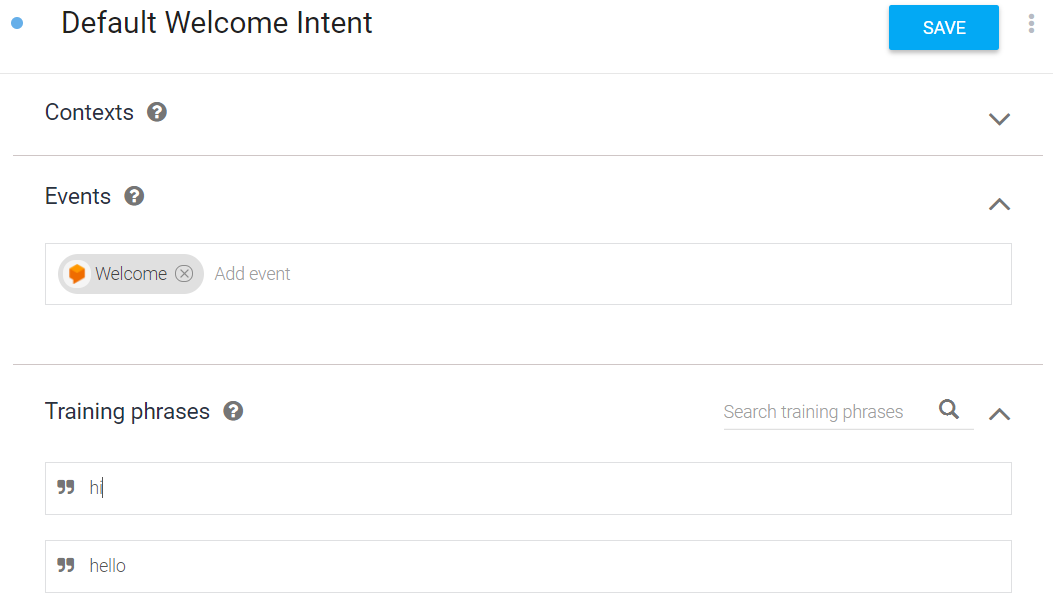
Press on Default Welcome Intent.
I will cover what Intents, Training phrases and Responses are in the next part of this tutorial, so don’t think of them now. Just do as I say.
Add ‘hello’ and ‘hi’ to the Training phrases by typing them in the text form and pressing enter after each of them.
Now go down to Responses and delete the current ones.
Press on ADD RESPONSES and then on Text response.
Now, like you did with the Training phrases, add a proper response. This is the first message the user will receive from the bot. Think of a normal conversation and imagine what a person would say, if you want your bot to look more conversational, but it’s a good practice to actually let the user know that they are talking to a bot and what’s the bot’s scope. I will add something like:
“Hello! My name is James and I am the virtual assistant of XYZ restaurant.
Would you like to book a table or learn more about our restaurant beforehand?”
Read More: What Is AI And Machine Learning? An Introduction For Clinicians
So the bot presents itself and presents the user some of its capabilities. This is more than enough for now. This message is a bit too long to be sent in a single line, but don’t worry, you will learn how to post multi-lines messages and randomize the responses later in this tutorial.
Step 4: Save
Don’t forget to always Save before you test the Intent or if you leave the page. Otherwise the changes won’t take effect.
Also, you should wait for Dialogflow’s training to be complete if you know you did everything right, but it’s not working. Two pop-ups will appear in the bottom right corner of the screen when the Agent started and finished training.
TRY OUT
That’s it, the bot is ready. Let’s test it. Dialogflow allows testing the Agent without having to even leave the webpage. In the right side of the page, there’s the testing environment. Enter “hi” or “hello” in the right upper corner of the screen.
You should be able to see your bot’s welcome response.
If you get another message instead, something like the bot saying it didn’t understand, make sure you saved the Intent and try again.
CONCLUSION
This part maybe wasn’t very exciting, but this is just the beginning. You created your first agent and got your first response from the bot. In the next parts I will show you how to train your bot and create a true conversation.
Sanjeev Agrawal
Sanjeev Agrawal, CEO of DreamSoft4u, brings 37 years of experience in the IT industry. He is dedicated to guiding others through the latest strategies and trends shaping the field. His goal is to help professionals navigate the modern tech industry with valuable, actionable knowledge that keeps them ahead in a rapidly evolving tech world. Through his leadership, Sanjeev explores the most effective strategies and emerging trends, driving success in the ever-changing world of IT.


 Now press SIGN UP FOR FREE.
 And connect with your Google account. If you don’t have a Google account, you will have to create one in order to use Dialogflow.
Read More: How To Build Facebook Messenger Chatbot Using ManyChat
Step 2: Create a new Agent
Choose a name for your new bot and the default time zone. To properly follow the tutorial, you should keep the language in english.
And connect with your Google account. If you don’t have a Google account, you will have to create one in order to use Dialogflow.
Read More: How To Build Facebook Messenger Chatbot Using ManyChat
Step 2: Create a new Agent
Choose a name for your new bot and the default time zone. To properly follow the tutorial, you should keep the language in english.
 Step 3: Make the bot say hello
Right now, the bot doesn’t know how to answer to any user input. The journey of teaching it how to behave is just starting. Firstly, let’s model a bit of the bot’s personality and make him/her respond to ‘hello’ and present itself.
Press on Default Welcome Intent.
Step 3: Make the bot say hello
Right now, the bot doesn’t know how to answer to any user input. The journey of teaching it how to behave is just starting. Firstly, let’s model a bit of the bot’s personality and make him/her respond to ‘hello’ and present itself.
Press on Default Welcome Intent.
 I will cover what Intents, Training phrases and Responses are in the next part of this tutorial, so don’t think of them now. Just do as I say.
Add ‘hello’ and ‘hi’ to the Training phrases by typing them in the text form and pressing enter after each of them.
I will cover what Intents, Training phrases and Responses are in the next part of this tutorial, so don’t think of them now. Just do as I say.
Add ‘hello’ and ‘hi’ to the Training phrases by typing them in the text form and pressing enter after each of them.
 Now go down to Responses and delete the current ones.
 Press on ADD RESPONSES and then on Text response.
Now, like you did with the Training phrases, add a proper response. This is the first message the user will receive from the bot. Think of a normal conversation and imagine what a person would say, if you want your bot to look more conversational, but it’s a good practice to actually let the user know that they are talking to a bot and what’s the bot’s scope. I will add something like:
“Hello! My name is James and I am the virtual assistant of XYZ restaurant.
Would you like to book a table or learn more about our restaurant beforehand?”
Read More: What Is AI And Machine Learning? An Introduction For Clinicians
So the bot presents itself and presents the user some of its capabilities. This is more than enough for now. This message is a bit too long to be sent in a single line, but don’t worry, you will learn how to post multi-lines messages and randomize the responses later in this tutorial.
Step 4: Save
Don’t forget to always Save before you test the Intent or if you leave the page. Otherwise the changes won’t take effect.
Press on ADD RESPONSES and then on Text response.
Now, like you did with the Training phrases, add a proper response. This is the first message the user will receive from the bot. Think of a normal conversation and imagine what a person would say, if you want your bot to look more conversational, but it’s a good practice to actually let the user know that they are talking to a bot and what’s the bot’s scope. I will add something like:
“Hello! My name is James and I am the virtual assistant of XYZ restaurant.
Would you like to book a table or learn more about our restaurant beforehand?”
Read More: What Is AI And Machine Learning? An Introduction For Clinicians
So the bot presents itself and presents the user some of its capabilities. This is more than enough for now. This message is a bit too long to be sent in a single line, but don’t worry, you will learn how to post multi-lines messages and randomize the responses later in this tutorial.
Step 4: Save
Don’t forget to always Save before you test the Intent or if you leave the page. Otherwise the changes won’t take effect.
 Also, you should wait for Dialogflow’s training to be complete if you know you did everything right, but it’s not working. Two pop-ups will appear in the bottom right corner of the screen when the Agent started and finished training.